 Premier pas dans ma recherche d’une plus grande efficacité du tir,
j’ai imaginé et créé la Méthode Eye Bird Shooting en 1993 – 1994.
Je suis parti de 2 principes.
Pour bien tirer, il faut pouvoir bien apprécier la distance et l’avance à mettre devant l’oiseau.
En premier la distance. Il faut bien l’évaluer par rapport à l’éloignement de l’oiseau tiré. Combien de fois ai-je entendu des tireurs parler de distances fantaisistes.
Je ne comprends pas, j’ai mis 2 mètres devant et il n’est pas tombé ???
Je défie quiconque de bien évaluer ce que font 2 mètres devant un oiseau en fonction de son éloignement.
Le problème est là.
Je me suis donc dit qu’il fallait avoir des éléments “repère d’échelle” dans l’espace du tireur, et dans sa mémoire visuelle.
Donc le premier point est d’estimer la distance de l’oiseau en fonction de sa taille.
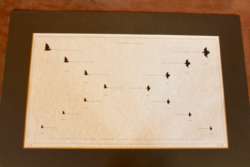
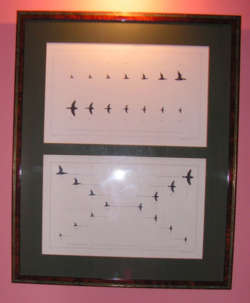
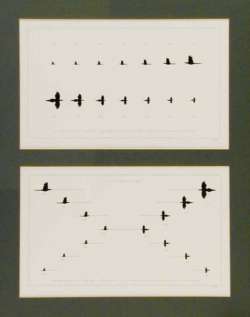
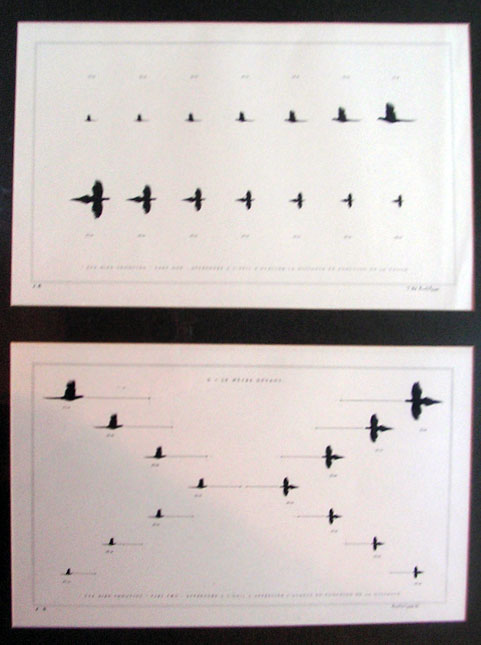
C’est le but de la planche EBS Part 1
Le deuxième est d’avoir une idée plus précise de ce que peut faire un mètre devant l’oiseau en fonction de la distance de tir. C’est l’objet du point repère qui est démontré dans la planche EBS Part .2
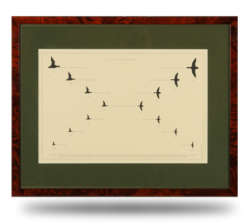
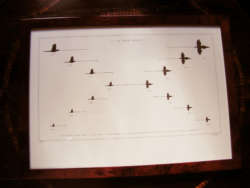
Pour imager ces 2 principes et démontrer leur validité, j’ai créé la collection complète Eye Bird Shooting – EBS avec les 5 oiseaux les plus couramment chassés. Cette collection originale a été appréciée par les chasseurs du monde entier. Pour bien utiliser la méthode EBS, il suffit de mettre le tableau au mur et de se placer à un bras de distance du tableau. La taille des silhouettes sera alors la représentation exacte de l’oiseau au bout du canon de votre fusil, compte tenu de son éloignement.
As a first step in my search for more effective shooting, I imagined and created the Eye Bird Shooting Method in 1993 – 1994.
I started from two principles.
To shoot well, you must be able to appreciate the distance and the advance to put in front of the bird.
First of all, the distance. It has to be assessed against the distance of the shot bird.
I heard gunmen talk about fancy distances.
I don’t understand, I put two meters in front and he didn’t fall?
I defy anyone to properly assess what a bird’s distance is two meters away.
That is the problem.
So I thought we should have “scale landmark” elements in the shooter’s space, and in his visual memory. So the first point is to estimate the distance of the bird based on its size.
This is the purpose of the EBS board Part 1.
The second is to have a clearer idea of what a metre in front of the bird can do depending on the range of fire. This is the object of the landmark that is demonstrated in the EBS board Part . 2. o capture these 2 principles and demonstrate their validity, I created the complete Eye Bird Shooting – EBS collection with the 5 most commonly hunted birds. This original collection has been appreciated by hunters around the world.
To properly use the EBS method, simply put the board on the wall and stand one arm away from the board. The size of the silhouettes will then be the exact representation of the bird at the end of the barrel of your rifle, given its distance. And depending on this distance you can get a precise idea of the value of a meter in front of the shot bird. Persevering in my research, I used this experience to later put, in 1997, the HBS Kinetic Method for High Bird Shooting.
As its name indicates, this method is particularly effective in shooting high-flying birds.(see HBS Method)